Friday, January 28, 2011

Annoying

Have you ever heard the rule........
that you should not decorate your house with family photos and personal artifacts, or that family photos should not be kept in public spaces or the rule that you should decorate with art not photos.  

Well, I have to say that this "rule"....... was undoubtedly meant to be broken!

I think that a home should look like a home, now I am not saying that every wall and table in a house should be covered in photos.

But I am saying that photos can be used instead of art.   If photos are done tastefully then they can and should stand in for art especially if you have a family and children.  What is better than having your children surrounded by family photographs?


Look at how great, not only the fabulous family photographs, but the children's art too.


Simple display of old photographs.


Now these are movie stars, but you could do this with family members also.


Now art can be fun too!!

Just do what makes you love your home, be it a rule breaker or not!!!


Tuesday, January 25, 2011

Love Me Some Remodeling

It is projects like these that tickle my insides.  

I am always amazed at remodeling or renovation projects, and to see the before and afters, wow..........

This project is even more awe inspiring because.....

 it was completed in 20 days, 

YES I said 20 days!!!

How is that even possible?  We have lived in our house for 7 YEARS and we are still not done!!!  

It is all just bonkers, bonkers I say.
So take a look at it's awesomeness...........


Isn't it beautiful!!  To see the full story on this remodel visit http://cotedetexas.blogspot.com

Monday, January 24, 2011

Working

I have been working on so many things lately.  
I am trying to get new items made for my etsy store, I have been trying to photograph each room of my house, because this year I want to make a few changes, I have been organizing and purging, and many other things.  So my life has seemed really busy lately.

I like keeping busy, but it seems somedays there is no down time.  So I have tried to slow down my mornings, while my daughter is in kindergarten.  I think that those 3 hours I will make mine to relax, rejuvenate and well.........
read blogs of course!!!

Here are some photos I have taken of my daughter's room;
as you can see she loves PINK!!!


There is  a great story about that bed!  I bought it in Vermont at a car show of all places when I was visiting my sister.  I live in Utah and you just can't find inexpensive iron beds here.  So it was cheap and I bought it thinking I could just have it shipped home.  Well my sister said that she would "store" it for me until I could have it shipped.

So when I got home I started looking for a way to get it to Utah.  Now I had never shipped anything this big before, so I had no clue that the post office, fed ex, UPS or any other shipping company would not touch something so large.

Long story short, I finally found a freight driver that would pick it up and drop it off at our house, so a year later I go it for her room.  Thank God we all loved it!!!  So the effort was worth it!


And all that really matters in the end, is that Irie, my daughter, loves it!

xoxoxoxoxoxoxoxoxoxoxo


Wednesday, January 19, 2011

WOW, What a Giveaway!!!!!


Holy crap!!!!  You should all head over to www.frenchlarkspur.blogspot.com for an awesome giveaway.  Just follow the link and see all the stuff you could win!!!

Antiquing a Mirror

Antiquing a mirror is not as hard as it seems.
There are many techniques to use.  This is just the one I use and like the look of.

You can buy kits on line for antiquing, but they are very expensive and toxic.  You can buy different formulas to get the look you want.  Like I said there are many ways to do it.

I had an old door I picked up from a salvage yard and I wanted to put a mirror in it  for my entry way.

So I took the glass out and bought some mirror the same size as the glass panels.
I have a connection at a glass place because I buy a lot of glass and mirror, so I get a great discount.  I think I paid around $40.00 for all 6 panels.

When you buy new mirror it comes with a grey or brown painted backing.


This needs to be stripped so that you can get to the silver.

I use a paint stripping product that is safe for the environment, but you can use whatever brand you want.


I use a paint brush to paint the stripper on. (no not that kind of stripper)
Then I let it sit until paint starts to bubble.


I then start to scrape off the paint.  This starts to show the silver of the mirror.


This is what it looks like on the front side of the mirror after the paint has been removed and the rest of the stripper has been rinsed off.


Now if you want to and you like the look you can leave it just like this.  In the stripping process some of the silver will come off with the paint.  So if this is just the look you want, stop.  I like it a little more "antiqued" so I keep going.


I then take the sander to it.  I use a very fine grit paper, like 220 or higher.  Just remember that if you do use a rough grit sand paper it will remove a lot of the silver. 


As I am sanding I keep checking the front to see if it is enough for me and if I am liking the look.

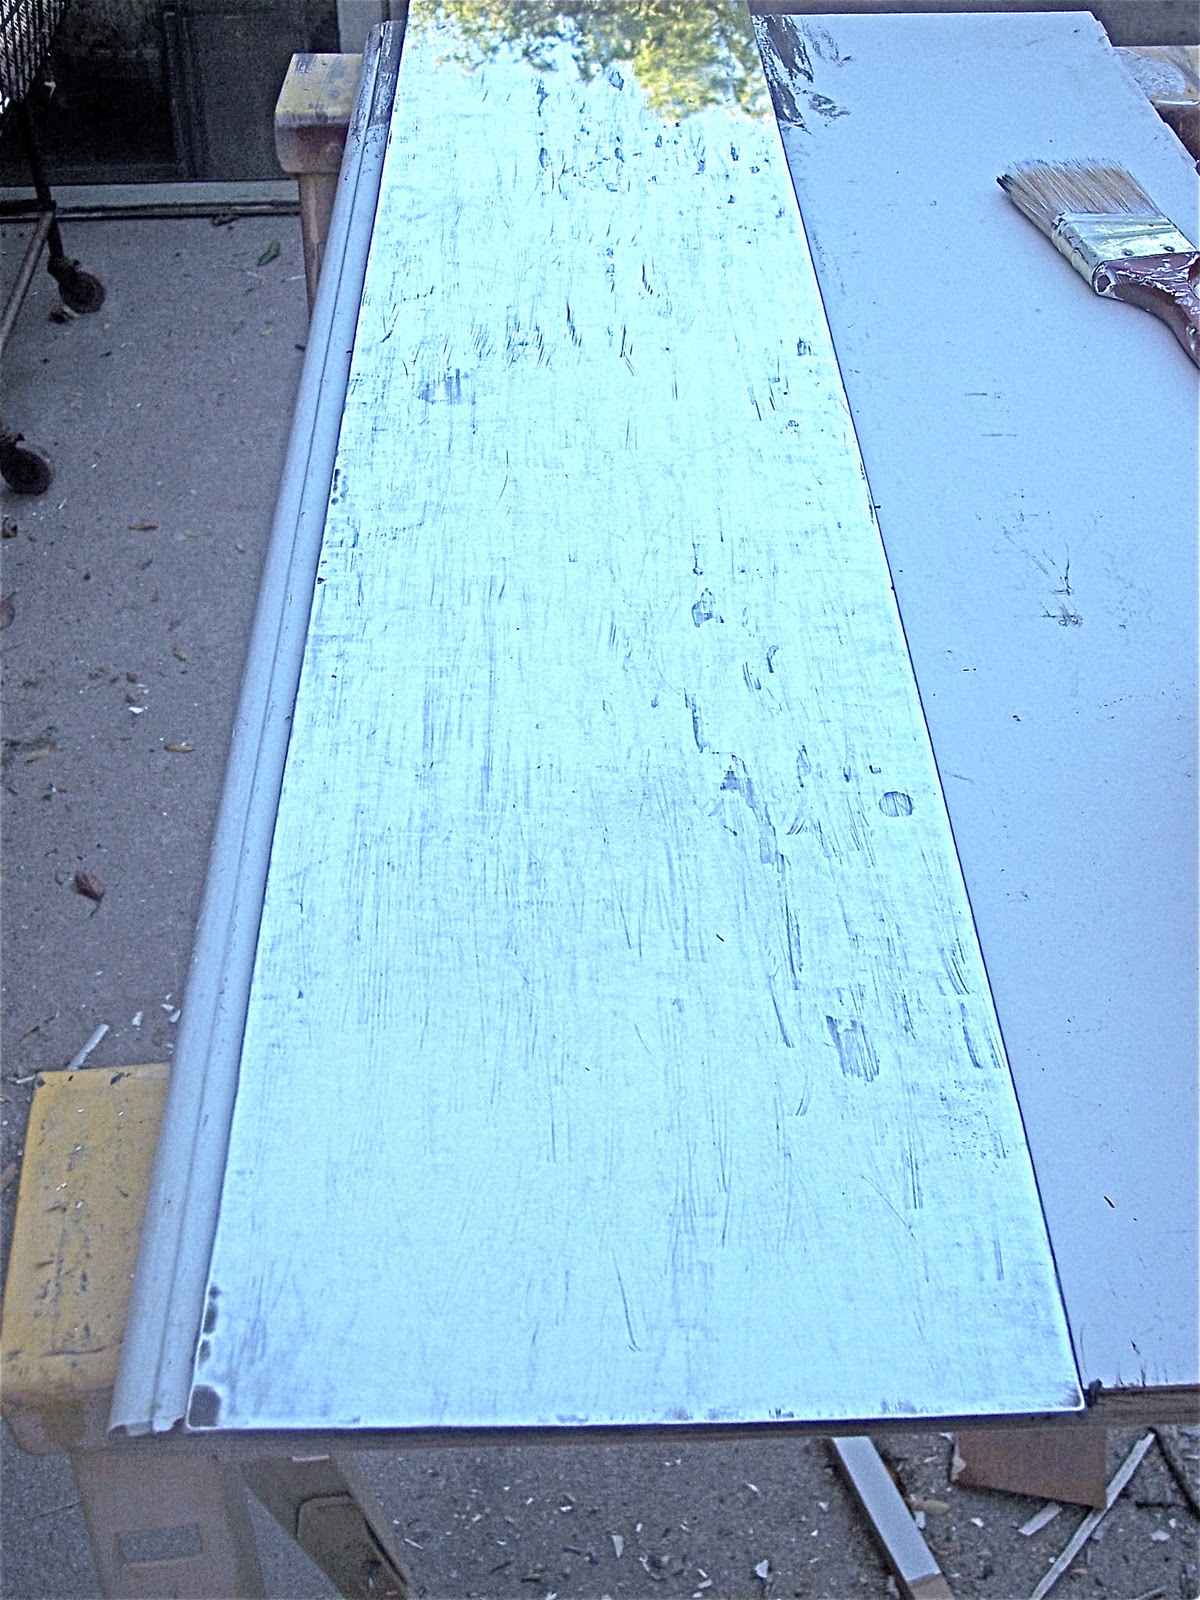
This is the sanded mirror on the back.

This is the sanded mirror on the front.

So after I get the silver off as much as I like, then I do the final step.  Now depending on how you want it look, there are a couple of ways to finish this off.   

  1. If you like all of the silver gone and want to be able to see through the mirror, as in holes in the silver, then do nothing. You are finished.
  2. You can paint the back grey again.
  3. You can paint the back brown, this gives it a sepia tone effect.
  4. You can paint it blue, sort of a light turquoise color.  Blue mirrors are in high demand.
  5. You can paint it black, for a dark antique look.


I personally like the dark effect, so I paint mine black on the back, then I seal it with a matte finish spray you can get at the craft store or a polyurethane spray.

I put the mirror panels back into the frame the same way I took them out.  I try to make the mirrors look as "naturally old" as possible, so I have been know to brake them so they look even older and have "been through a lot".  But you can do whatever you want, that is the beauty of DIY and old looking things.

This is after the back has been painted black.

Close up!

This is a close up of the "oldness" of the mirrors. LOL


And here is the finished product in my entry way!  Love, Love, Love it!!!!!


Tuesday, January 18, 2011

A Change is in the Air

Thanks for being so patient on the change of our living room.  

I have been really sick the last few days.

Anyway I am feeling a lot better now. 

before


after


before


after


Here are a few more angles and details:


I really like the update and I think that it is a fresh look for the new year.


Thank you so much for all of the wonderful and kind comments on my guest room post!

Saturday, January 15, 2011

Updated Livingroom

I have been in the process of updating my living room.  
Just a few changes nothing major.  

I have moved somethings in and taken somethings out.  I can't wait to show you.  But you will have to wait till tomorrow for the after.


Thursday, January 13, 2011

Guest Room

This is the guest room in our house.  I am thinking of doing something architectural to the walls, but we will see.  I need to experiment a little first and then I will let you know what happens.  But for now this is what it looks like.